Before you start
- A Mac running macOS 13 or later
- JoyHarness downloaded and installed. It's notarized by Apple, so it opens with a double-click
- At least one charged Nintendo Switch Joy-Con
- A voice input tool you can start with a shortcut, such as Typeless
- In that tool's settings, set the start shortcut to fn first. JoyHarness sends fn; answering it is that tool's job
Step 1
Allow Accessibility
This is the macOS switch that lets an app press keys for you. Without it, the controller's buttons do nothing. JoyHarness doesn't ask for Input Monitoring and doesn't watch your keyboard.
AccessibilityPresses the shortcuts you've set up
Step 2
Pair any one Joy-Con
- Open System Settings → Bluetooth.
- Hold the small round button on the rail of the controller until the lights run back and forth, then click Connect next to it in the device list. It buzzes once when it connects.
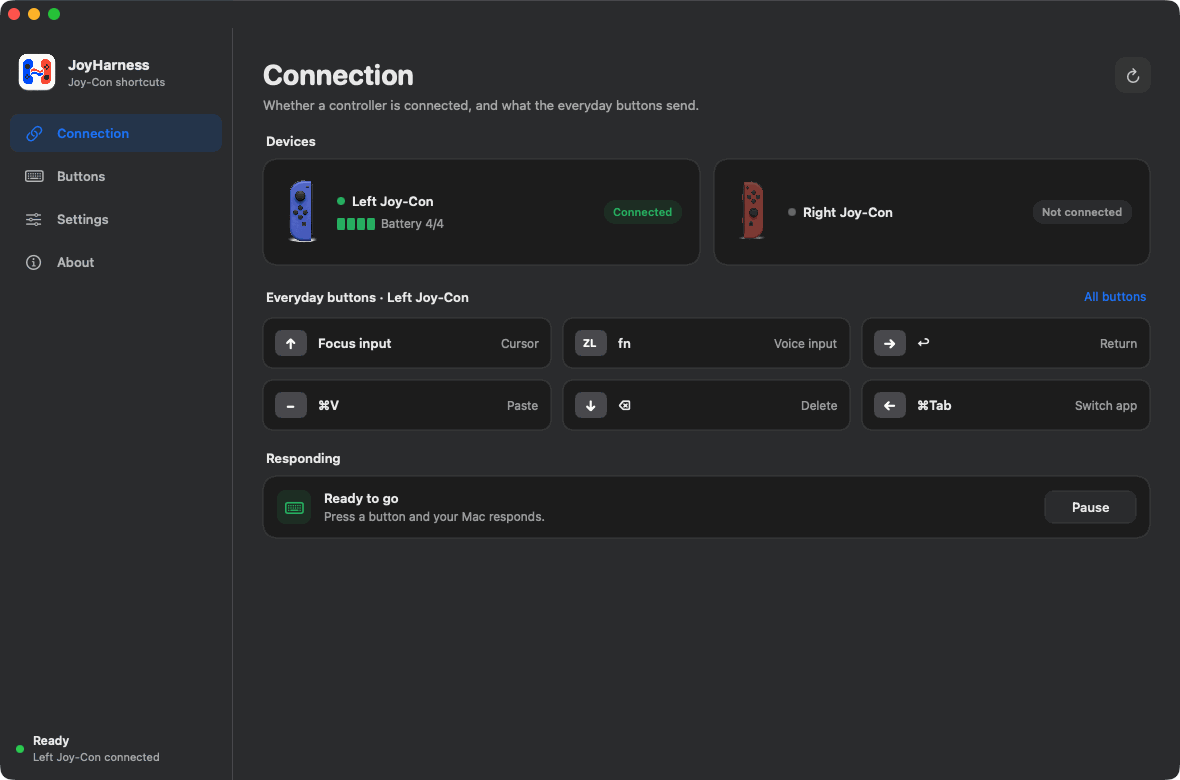
- Back in JoyHarness, check that the Connection page shows the controller's name and battery, and that Responding says Ready to go.
One is enough. The left or the right Joy-Con on its own does everything; a pair only adds a few more buttons.
Step 3
Practice twice in a pretend chat
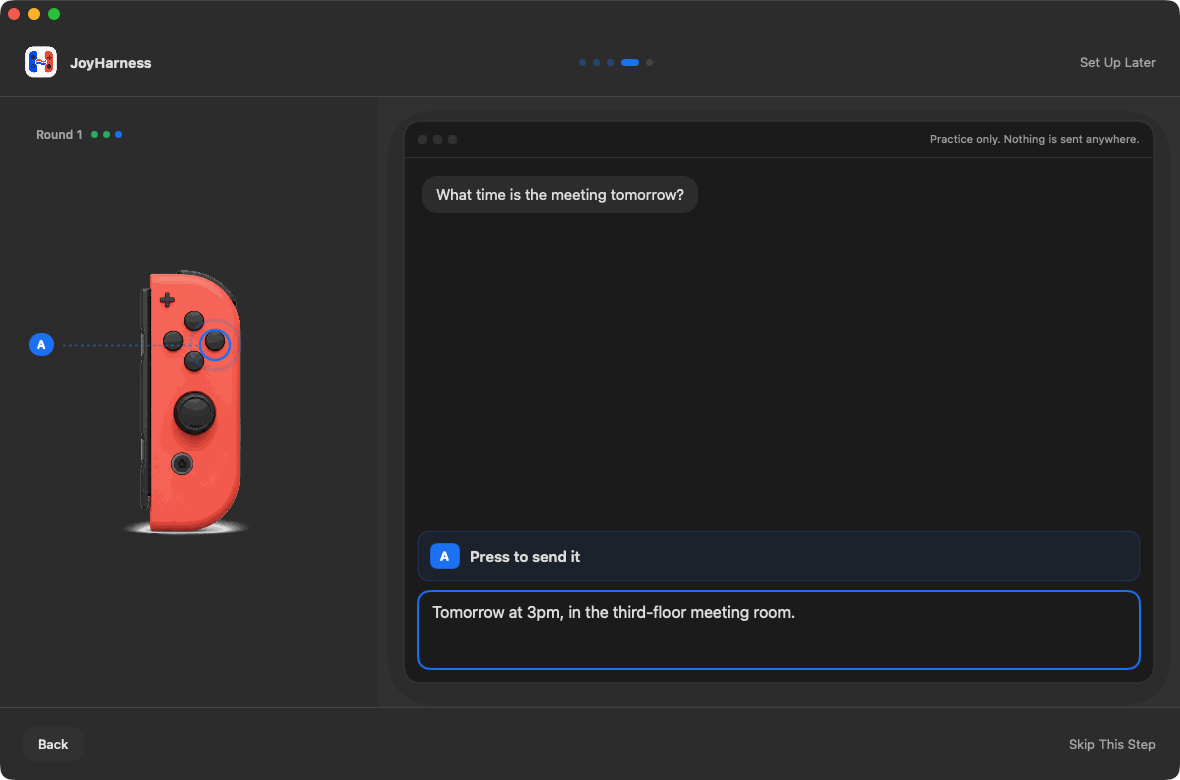
The walkthrough ends in a practice conversation. Only the button being taught works, and what you say doesn't have to match the example.
- Round one: X puts the cursor in the field, ZR to say a line (press to start, press again to stop), A to send.
- Round two: + to paste, hold B to delete the extra bit, hold A for a new line (let go when it buzzes), say one more line, send.
After that, every text field works the same way.
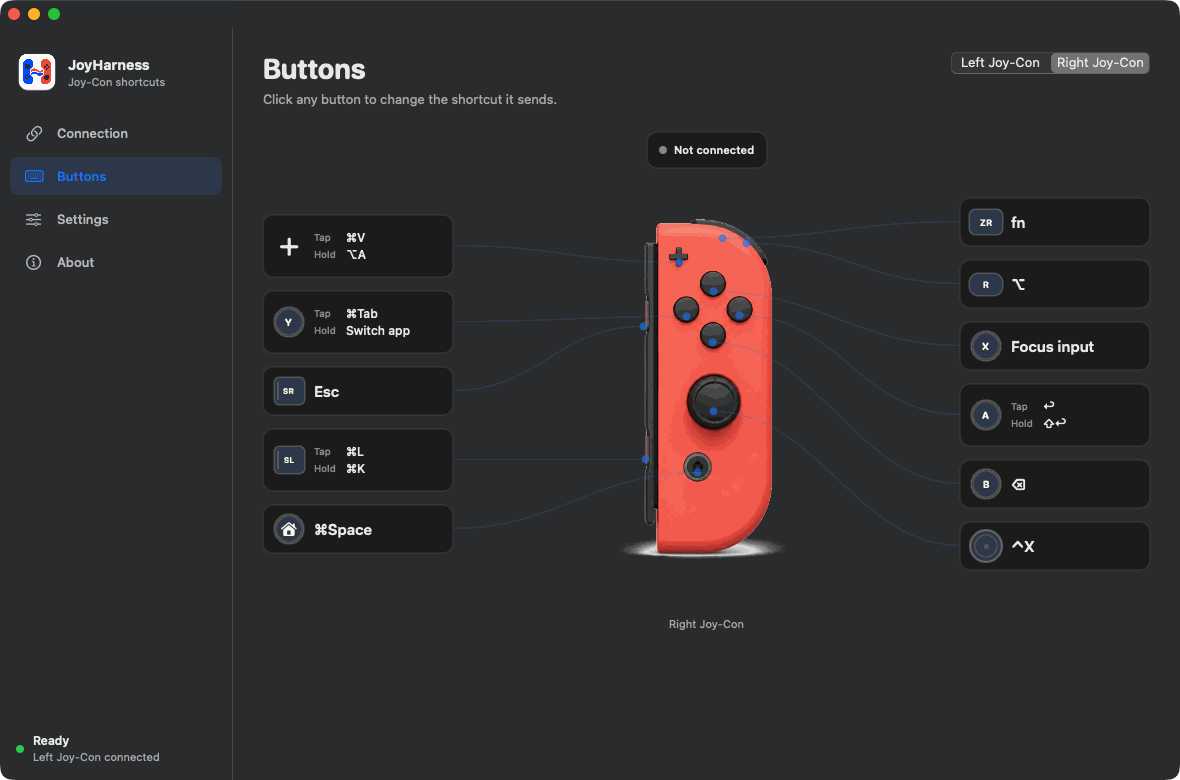
The three buttons on the right Joy-Con you'll use most
ZR pressfn · start talking
+ press⌘ V · paste
A press↩ · send
Three signs it works
- The Connection page shows the controller connected, and Responding says Ready to go
- After ZR, your voice input really types into the field
- After A, the app in front really sends, or correctly starts a new line